Sales Tax
Configuration > Point of Service > Sales Tax
Sales Tax can be recorded at the Point of Service based on item and building configuration.
Sales Tax Screen
-
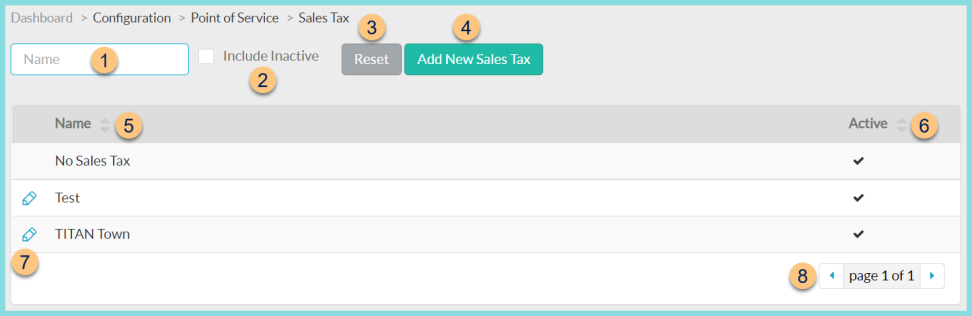
Name - search by name
-
Include Inactive - check to include inactivated items in results
-
Reset - click to reset search parameters
-
Add New Sales Tax - click to add a new tax structure
-
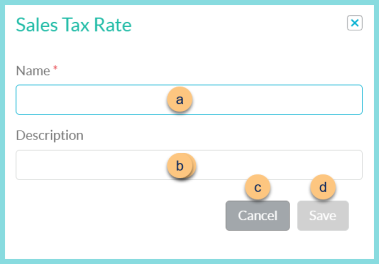
Name - enter a name
-
Description - enter a description
-
Cancel - click to return to create new structure and be redirected to the individual sales tax screen (details below)
-
Save - click to save changes
-
Name - click to sort by name
-
Active - click to sort by active status
-
Pencil - click to be redirected to the individual sales tax screen
-
< > - click to scroll through pages
The following structure exists by default:
-
No Sales Tax (protected)
Individual Sales Tax Screen
-
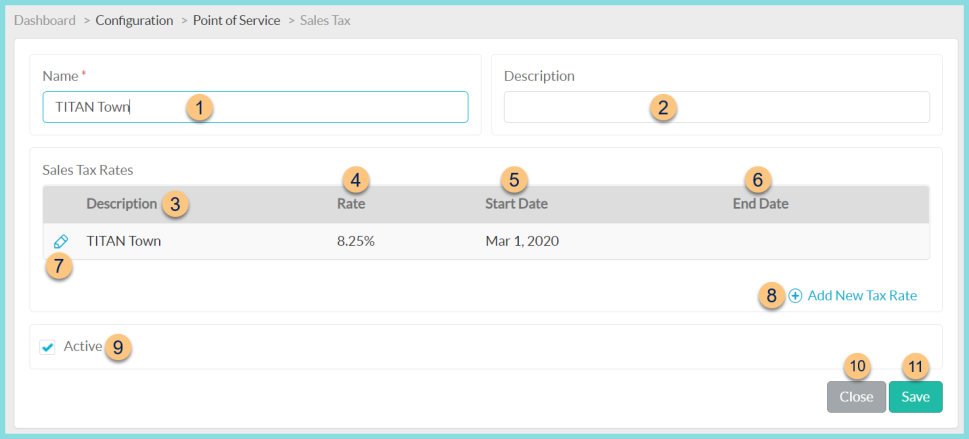
Name - change name if needed
-
Description - change Sales Tax Description if needed
-
Description - notice Sales Tax Rate Description
-
Rate - notice tax rate
-
Start Date - notice the tax rate start date
-
End Date - notice the tax rate end date
-
Pencil - click to edit existing tax rate
-
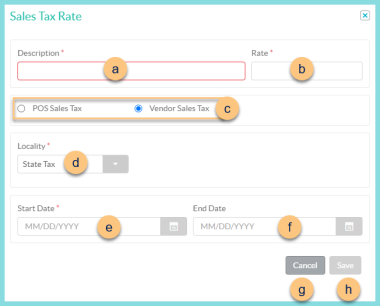
Description - enter Sales Tax Rate Description
-
Rate - enter rate as a percentage (Ex: 8.25 NOT .0825)
-
POS Sales Tax, Vendor Sales Tax - select whether this rate applies to POS sales or Vendor receipts
-
Locality (Vendor Sales Tax only) - select whether this is the State Tax, County Tax, or Local Tax. Note: If POS Sales Tax is selected, State is the only available locality. Enter the entire sales tax rate as needed for POS Sales Tax.
-
Start Date - select the tax rate start date
-
End Date - select the tax rate end date or leave blank if the end date is unknown
-
Cancel - click to return to the previous screen without saving changes
-
Save - click to save changes
-
(+) Add New Tax Rate - click to add a new tax rate. See Step 7 for details.
-
Active - toggle active status
-
Close - click to return to the previous screen without saving changes
-
Save - click to save changes